Sunday, April 14, 2013

100 things to paint with


Dylan wasn't really into art and painting as a baby and he wasn't very interested in paint brushes. To get his attention and enthusiasm I let him paint with his cars and trains (the cheaper ones). He loved it.

This then inspired me to think of and search for other painting ideas or which i found plenty and I am sure there are many more.

As we use each apparatus to paint with I will update this blog entry with pictures and suggestions.


1. Potato masher: dip the masher into the paint and stamp it onto paper.

2. Drinking straw: tape some straws to a lollipop stick and use as a brush or simply use them as they are.

3. Finger

4. Stacking cups: usually hand size for little ones so ideal to hold and dip into paint and then stamp onto the paper.

5. Sponge: you can use sponges on their own or on a stick. We have also tried sponges attached to pegs.


6. Spaghetti: cooked spaghetti or noddles look really fun to paint with.

7. Popcorn: dip popcorn in paint, you could probably use pegs to hold them but I don't think this will be as fun.

8. Cookie cutter

9. Hand

10. Pine cone: we tried this. We put them pine cones on a paper plate and painted them for using as another craft project and the rolled them around the plate. You can also use them to dip in paint and stamp onto paper.


Plate used for painting pine cones on.
11. Bubble wrap: You make use it to make the end of a brush. Cut out shapes or use it the print by placing paper on top of a piece of painted bubble wrap.

12. Celery

13. Bubble wand: use recycled bubble wands or homemade ones using pipe cleaners.

14. Using fishing rod: use the reel to lower things with paint on down to the piece of paper.

15. Water bead: place the beads into paint and then into a cardboard box with paper in. The roll them around.

16. Syringe: use a syringe to squirt paint.

17. Plastic Easter eggs: You could fill them with paint and drop them to break open or dip them.

18. Body

19. Ketchup bottle: Squirt paint

20. Tooth brush: I would use cheap ones rather than old ones for hygiene reasons.

21. Homemade paint icelolly: using an ice cube tray and lollipop sticks freeze

22. Acorns

23. Pipe cleaner: make pipe cleaner brushes or use them on their own. You can make them into letters, numbers and shapes.

24. Thumb

25.Leaves: paint onto leaves and use them to print or dip into paint.

26. Spatula: use them to add paint and as a brush to move paint.

27. Foot

28. Nail scrubbing brush

29. Feathers: again you could make them into a brush or use them on their own.

30. Slide: roll objects down the slide onto paper or squirt paint down it.

31. Okra: dip and print

32. Elastic bands brush

33. Magnet: using a magnet and something like a paperclip to move paint around.

34.Cotton buds: We have used this for dipping and painting Easter eggs. You can use it to make shapes, numbers and letters onto card and print using them.

35. Flowers: Dylan loved this he dipped flowers in paint and stamped them onto the paper.

 
36. Party blower: blow into the paint and then onto the painting

37. Tennis ball: dip the balls in paint and roll around a tub with paper in. You could throw them at the paper or attach them to a stick and paint.

38. Elastic snap painting: Use elastic bands over a box, paint the banks and flick them. You could also use them to make a catapult to paint.

39. Potatoes: easy to carve shapes

40. Pumpkins: paint pumpkins and then roll the pumpkin on some paper.

41.Packing peanut: dip and paint (caution with this activity- chocking

42. Scrubbing brush

43. Carrots

44. Marbles

45. Corn cob

46. Bubbles

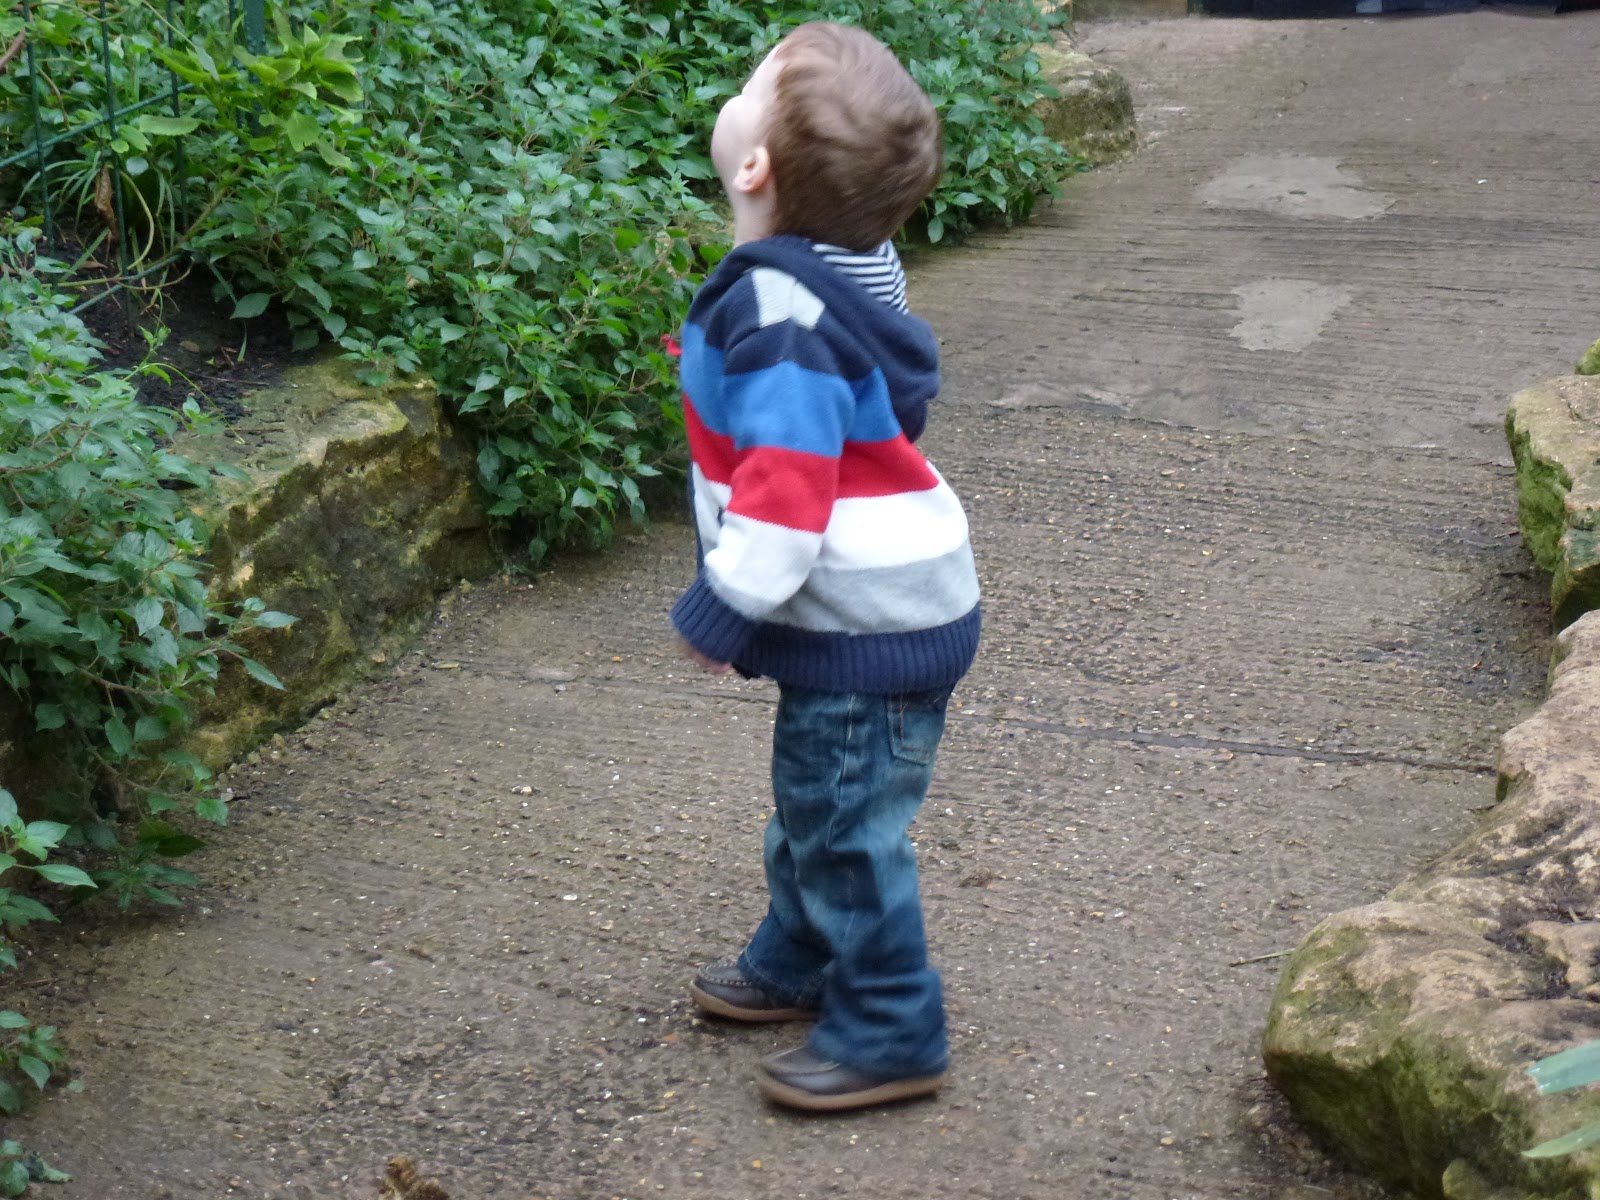
47. Polystyrene: carve patterns, shapes, numbers etc into it and paint it then print.

48. Egg carton

49. Apples: cut into segments or paint he outside and roll.

50. Pendulum: attach something with paint to the end of some string and swing it into a piece of material you want to paint.

51. Toy cars: Use old or cheap toy cars to roll in paint and then transfer to material. we tried this Dylan loved it and he also enjoyed the carwash after.
 
Painting with toy cars and trains.


Carwash after painting with cars.


52. udder made from rubber gloves or balloons

53.Shoes

54. Broccoli and cauliflower: We used left over scraps but you could use actual florets.

55. Cardboard shapes

56. Water balloons: Throw them at the canvas

57: Pipettes: to squirt paint
58: Fabric: Throwing at a canvas or pulling around a canvas.

59. Shower puff: This could be thrown, attached to a stick or simply used with their hands.
60. Screwed up ball of paper: attach to a stick, throw/drop onto a canvas or use hands
 
61.Egg cups
62. Fruit mesh: save the mesh/netting from the fruit and paint it and print. Or use it to make a brush.

63. Toilet rolls: If used whole you could roll them or cut them into smaller pieces. You can also squirt paint inside them and let it drip.
64. Bottle tops: You can use them as they are or add foam shapes to them.

65. Screws, nuts and bolts- dip into paint and transfer. Or place them in a box and roll them.
66. Balloons: on a stick inflated or at the end of a brush deflated. You could fill with paint and pop them.

67. Spoons. knives and forks- plastic probably a better idea.
68. Yoghurt pots: You could add foam shapes to the top to print.
 
69. Hairbrush- again probably better with cheap new one than used.
70. Colander: pou paint into a colander and let it drip through whilst you turn it

 71. With gloves on: put gloves on before painting with your hands. Many different style gloves to try.
72. Dice- roll dice in paint- not sure what it would look like.

73.CDs: Cd spin art looks great. Could just used form printing

74. Paper plates- use them to do printing
75. Cotton balls: use pegs to make it easier.

76.Pasta: lots of different pasta shapes to try printing.

77. Toy footprints

78. Toy tools- hammer
79. 3D Shapes

80. Keys

81. Money
82. Sticks

83. Rubber ducks: Dip them in paint and stamp them onto the canvas.
84. Shells: paint and roll them onto the paper.

85. Comb: seen some lovely rainbow design combs.
86. Socks on

87. Finger puppets

88. Stones
89. Old nail varnish brush

90. Glue applicator sticks

91. Stuffed gloves and socks

92. Spikey balls
93. Peppers

94. Match sticks
95. Mascara brushes

96. Golf balls
97. Yoyo

98. Pom poms

99. Chop sticks

100. String/wool

 Please remember some of these activities pose a risk to small children and babies so choose wisely and do not leave them unattended.
 
I would definitely be interested in learning how you utilize the same materials or other materials that you use for painting.
 

Saturday, April 13, 2013

Eric Carle style Butterfly

During the summer bucket list last year we had a day dedicate to the author of the Hungry Caterpillar book Eric Carle. When I was searching for ideas I found a lovely piece of art on http://theimaginationtree.com/2011/06/eric-carle-tissue-paper-prints.html and I have wanted to use this idea ever since. We adapted it slightly as we never used printing or tissue paper.

After the shapes butterfly activity we had a cut out of the wings on card. So we used this to give us the shape of the butterfly.
 
I also utilised the left over painted eggs we made as cards to cut into the shapes for decorating the wings. Dylan painted these with finger paints for Easter.


Dylan finding the shapes already stuck on.

Dylan matching the shape on the other side.

The master piece.


We recently visited a butterfly farm and read the hungry caterpillar book so this activity fits really well.
It was really easy to set up and not very messy as we used old art projects and recycled craft bits.

What do you need?
Card
Old pieces of painted/printed art (or paint/crayons to make some)
Scissors
Double sided tape or PVA glue
Googly eyes
Lollipop sticks
Antennae

 
Learning activities/ ideas

Talk about butterflies
Read the hungry caterpillar
Shapes identification
Shape match
Symmetry
Left and right sides.
Googly eye matching
Craft stick colour matching.
Describe colours
Using fine motor skills to handle shapes and eyes.
 
This was the second butterfly craft project of the day and he was getting tired so I did a lot of the work really.  He did well to match the eye design and size and he selected  matching colour lollipop sticks. He identified all the shapes and pointed to them on the side I had already stuck down. He found matching them on his side much more difficult than the Foam Shape butterfly we did earlier. Maybe as this was quite compact it might have been better to have smaller shapes or less of them.
Dylan loved sticking the eyes on and the antennae.


Any suggestions welcome.
Enjoy and let me know if you plan on using this.


Date of activity Wednesday 10th April
 
Dylan 2.4 Years


Foam Shape Butterfly

After the recent visit to the Stratford Butterfly farm I searched some ideas for butterfly craft. I saved the images of the designs I liked and asked Dylan which ones he liked and wanted to make.
He chose the toilet roll butterfly.

The beautiful butterfly we made.
What do you need?

Toilet roll
Card
Paint (optional)
Foam shapes
Double sided tape or PVA glue
Googly eyes or buttons (optional)
Pipe cleaners
Scissors

Firstly we got the toilet roll to measure out how big we needed the strip to cover it to be. Then I cut the strip and placed the double sided tape on the toilet roll vertically. Dylan helped to press down the card until we had covered the roll. Then I added more tape to the card to completely wraped the card around.

The rest of the card from one A4 sheet was used to make the wings. I folded it in half and cut the wings so they were symmetrical. Remember not to make them bigger than the roll if you want it to stand rather than hang. I kept the outline of the wings for another butterfly craft project.

I placed a strip of tape down the middle of the wings and Dylan helped to stick the down.
Whilst I was busy I gave Dylan the task to match the googly eyes and select a pair of equal size/design he liked. Using the tape we stuck them in place.

Next I emptied out the foam shapes and asked him to pick certain shapes and colours. He then had to find the matching pair. Then he needed to place them on the butterfly symmetrically. After he had done this I added tape and he helped put them back in place and attach them.

Finally I used one pipe cleaner, Dylan selected a colour. I trimmed it down and placed tape on the inside of the roll. Dylan folded the pipe cleaner in half and placed it on the roll.
Matching shapes on each wing.


Finding matching shapes

Flying practise


I didn't time the activity but I imagine it took 15 mins. Varies with the resources and child I suppose.
Dylan loved this activity and was really focused for him. This activity is not very messy at all if you used card and tape instead of paint and glue.

Learning ideas

Shape identification
Shape matching (colour/size)
Shape symmetry
Left and right sides
Talk about life cycle of a butterfly ( maybe the roll can be the caterpillar??)
Roleplay action of a butterfly.
Counting shapes/ wings/eyes/antennae
Use of fine motor skills handling shapes
Sorting shapes
Matching googly eyes (shape and design)

Have you done this activity before? If so would love to hear your tips and see your final butterfly.
Any suggestions on improvements or alternatives would be gratefully received.
If your thinking of trying this enjoy!


Date of activity Wednesday 10th April
Dylan 2.4 years

Visiting Stratford Butterfly Farm

I think visiting a Butterfly farm is like Marmite you either love it or hate it. I personally think it is great but my sisters and cousin are not quite sure. I did feel uneasy the first time I visited but found you soon get used to it and start to relax. So if it has this effect on adults I wondered how it would affect my 2 year old.


Dylan's first encounter happened almost immediately, a butterfly landed on me. He looked scared and told it to fly away bless him. But after a few encounters and witnessing myself and other children enjoying the close proximity he soon started talking to them and describing them.


Love it or hate it!
Look mommy.


Dylan's blue butterfly.


Before we went I made sure that we read the fantastic Hungry Caterpillar book.  We had fun last summer using fruit to re-tell the story. However it is a baby version really as there are less words, less items fed on and a finger puppet. So after the visit we updated our book collection to the full version. Dylan was a little confused first time we read it as he loves the other book but was intrigued by the new one and I have already read it about 10 times in five days.

 
At the Stratford Butterfly farm you can also see a variety of invertebrates including many species of spiders. I also spotted a few amphibians and birds.

 Learning ideas

BEFORE YOU GO
Read a butterfly book
Discuss butterflies (life cycle)
Show pictures of real butterflies
Butterfly craft
Make predictions
Plan a butterfly species checklist
Make butterfly flashcards

WHEN YOUR THERE
Life cycle of a butterfly
Bug/animal safari
Colour safari
Butterfly species spotting (tallying)
Talk about predictions made
Take pictures

AFTER THE VISIT
Read a butterfly book
Discuss butterflies (life cycle)
Show pictures of butterflies seen on the visit
Butterfly craft
Talk about predictions made and the results
Use pictures to make a storybook/scrapbook/eye spy books/ flashcards
Use pictures to make electronic resources- flashcard, eye spy images
 
We haven't done all of these after activities but we can save them for another time or the next visit. Great learning experience, love it there and would definitely recommend it.

Do you have any other suggestions of what we could do next time?
Date of visit: Monday 8th April 2013
 Dylan 2.4 years